If you're searching for how to get scratches out of wood, you're probably staring at that damage right now, wondering if it's ruined. Most scratches that look terrible at first glance are surface-level and incredibly easy to fix. In fact, the methods furniture restoration experts use for minor scratches are the same DIY tricks you can do at home.
Lumber Grand covers everything from how to get scratches out of wood floors to tables. Some take literally 30 seconds with a walnut (yes, really). Others might need 5 minutes and a repair marker. This guide breaks down exactly which method works for which type of scratch, so you're not wasting time on fixes that won't help your situation. Read more!
Before You Start: Diagnose Your Scratch Type First
Not all scratches are the same, which matters more than you’d think. The depth of your scratch determines how to fix scratches on wood. Here’s what you’re dealing with:
1. Surface scratches (the easy ones)
These only affect the finish layer, that protective coating on top. The actual wood underneath is fine. Surface scratches are quick fixes because you're just filling in or blending the finish layer.
2. Deeper scratches (a bit more involved)
These cut past the finish into the wood grain itself. You'll see actual wood color showing through, usually lighter or darker than the surrounding area. These need wood markers, fill sticks, or touch-up pens that match your table's color.
3. White marks (not actually scratches)
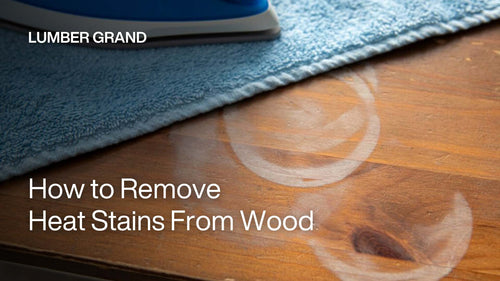
Here’s what people get confused. Those white marks aren't scratches at all. They're heat or moisture damage from hot mugs or wet glasses left too long. The moisture trapped in the finish creates that cloudy white look. The good news is that these often have easier fixes than actual scratches.
Quick test: Run your fingernail across the scratch. If it catches, the scratch cuts into the wood. If it glides smoothly, it's surface-level or just a white mark. This tells you which repair method to use.

The type and depth of your scratch determine the fix wood floor scratches method
Photo: Freepik
You might be interested in: How to Remove Heat Stains from Wood
Your 5-Minute Repair Sheet: How to Get Scratches Out of Wood
Now that you know what type of scratch you’re dealing with, here’s your cheat sheet. Lumber Grand’s table breaks down 6 methods, what you’ll need, and what result to expect. Pick the one that matches your scratch depth and what you’ve got at home.
|
Method |
Tools Needed |
Best For |
Result |
|
Walnut Rub |
Shelled walnut Soft cloth |
Light, shallow scratches on medium to dark natural wood |
Natural oils blend with grain for a warm, even tone |
|
Oil + Vinegar Blend |
Olive or walnut oil Vinegar Soft cloth |
Fine surface scratches, dull finish |
Restore shine and smooth out micro-scruffs |
|
Furniture Marker |
Wood-tone touch-up marker Soft cloth |
Visible but shallow color breaks |
Covers scratches instantly and restores uniform color |
|
Repair Stick/Wax Filler |
Wood repair stick or wax crayon Soft cloth |
Moderate scratches or shallow dents |
Fills and conceals surface gaps with a smooth finish |
|
Wood Filler (Deep Repair) |
Wood filler Putty Knife Sandpaper (optional) |
Deep or structural scratches |
Level and seal the surface, ready for refinishing if needed |
|
Sanding & Refinishing |
Fine-grit sandpaper Wood finish or polish |
Worn areas, heavy scratches |
Remove deep marks and reveal a renewed surface |
Latest blog this week: How to Remove Super Glue from Wood
How to Get Scratches Out of Wood: 6 Simple Ways to Heal the Surface
You’ve got your method picked out from the table above. Now let’s walk through exactly how to do it. Just follow the steps, and your scratch will be way less noticeable (or completely gone) in a few minutes:
1. Walnut Rub: Natural Wood Touch-Up
Best for: Light scratches on medium to dark natural wood finishes
This sounds too simple to work, but it does. Walnut oil contains natural pigments and fatty acids that penetrate wood fibers. Rub the nut over a scratch, and those oils fill the gap, restore color, and condition the wood table. The oils fade within a few weeks to months, so for lasting fixes, use Methods 3 — 5.
Follow these steps:
-
Step 1: Break open a walnut and grab the nut part. Ensure that there are no shell pieces attached.
-
Step 2: Rub the walnut directly onto the scratch with force. You're attempting to get the oil from the nut to transfer into the grain. Rub back and forth several times, usually 10 — 15 passes.
-
Step 3: Allow it to rest for approximately 5 minutes. The oils must allow themselves some time to penetrate and darken the scratch.
-
Step 4: Buff the surface using your soft rag. This bonds the walnut oils to your finish and cleans off any excess residue.
-
Step 5: Finally, inspect your wooden table top. The scratch should be less noticeable or even invisible. If you still see it, repeat the process.
Note: If your table is painted, lacquered white, or has a light finish, the walnut oil might darken it too much. Test on a hidden spot first if you’re not sure.

How to get scratches out of wood floor with walnut
Photo: The Project of Life
2. Oil + Vinegar: Fix Light Scratches
Best for: Fine surface scratches, dull finish, and restoring shine on finished wood tables.
The combination of oil and vinegar works exceptionally well. The acidity of vinegar is gentle, but it effectively cleanses wood furniture and softens the finish slightly. Then, the oil will fill the tiny holes, condition the wood, and leave a protective layer that shines. Together, they’re like a mini-refinishing treatment that only takes 5 to 10 minutes instead of 5 hours.
Do this simple how to get scratches out of wood floors:
-
Step 1: Mix your oil and vinegar in the small bowl. The ratio is 3 parts oil to 1 part vinegar. Stir it together (it won’t thoroughly blend, and that’s fine)
-
Step 2: Dip your cloth into the mixture and discard any excess. You’ll want it damp, not dripping.
-
Step 3: Gently rub the mixture in circular motions over the scratched area. Try to follow the grain of the wood as much as possible and rub for about 30 — 60 seconds.
-
Step 4: Let the mixture sit on the wood for 2 — 3 minutes. This gives the oil time to penetrate and the vinegar time to work on the finish.
-
Step 5: Use a clean, dry section of your cloth to buff the area gently. You’re removing excess oil and bringing out the shine.
-
Step 6: Then, stand back and look at the wooden table. The scratch will be reduced, and the whole area will look refreshed.
Note: The vinegar will break down the wax. Do a test on the underside of the table or an inconspicuous edge if you are unsure of the finish on your table.

How to get scratches out of wood table with oil and vinegar
Photo: Pneumatic Addict
You might like: How to Remove Sticky Residue from Wood
3. Furniture Marker: Hide Surface Marks
Best for: Visible scratches where the color is noticeably lighter or different from the surrounding wood.
Furniture markers are made specifically for wood scratches. The pigments match wood tones and seep into exposed fibers to camouflage the damage. You're not repairing the scratch, but you're making it invisible by color-matching.
This is how to repair scratches in wood step by step:
-
Step 1: Pick the right marker color. Shake it well and test on a hidden spot or scrap wood to confirm the match.
-
Step 2: Color over the scratch using smooth, even strokes following the wood grain. Don't press too hard. We fill the scratch, don't create a darker line on top.
-
Step 3: Let the marker ink dry for about 30 seconds.
-
Step 4: Wipe away any excess ink outside the scratch with your soft cloth. You’re blending the edges so it doesn’t look like you drew on your table.
-
Step 5: If the scratch is still visible, apply a second coat. Deeper scratches sometimes need two passes to fully cover the lighter wood.
-
Step 6: Buff the area lightly with your cloth to blend everything and restore a subtle shine.
Note: Most hardware stores have sets with multiple wood tones. If you’re between two colors, opt for a slightly lighter shade. It’s easier to darken than lighten.

How to get a scratch out of wood table with a furniture marker
Photo: Edding
Read more: How to Remove Acrylic Paint from Wood
4. Repair Stick: Fill Minor Scratches
Best for: Moderate scratches that catch your fingernail and shallow dents that need actual filling.
When markers won’t cut it because the scratch is too deep, repair sticks step in. The wax or putty in repair sticks is soft enough to press into scratches but firm enough to stay put once it’s in place. Plus, it adds a protective layer against dust and moisture that helps prevent future scratches.
How to get scratches out of wood without sanding:
-
Step 1: Clean the scratched area with a slightly damp cloth. Let it dry completely.
-
Step 2: Rub the repair stick directly into the scratch using firm, even pressure. Work it back and forth to pack the wax into the groove, not just color over the top.
-
Step 3: Keep filling until the wax is roughly even with the table's surface. Removing excess is simpler than adding more.
-
Step 4: Use your cloth (or plastic card) to smooth the wax flush with the table. Wipe away any excess sitting on undamaged wood around the scratch.
-
Step 5: Buff the area with a clean section of your cloth to blend the edges and restore shine.
-
Step 6: Allow it to dry for a few minutes, then examine your wood.
Note: These sticks can soften slightly in hot conditions, so avoid placing hot items directly on repaired spots.

How to fix scratches on wood with a repair stick
Photo: TimbermateGroup
6. Wood Filler: Repair Deep Scratches
Best for: Deep scratches that bite into the wood grain, gouges, and structural damage that require serious filling.
This is the heavy-duty how to remove scratches from wood floor. When your scratch is deep enough that you can almost see the wood's soul, wood filler is what you want. It attaches to the surrounding wood fibers and fills the gap entirely. The result is a hard surface you can sand and finish exactly like the rest of the wood.

Wood filler to fix wood scratches furniture
Photo: Freepik
Here is how to do it:
-
Step 1: Clean out the scratch thoroughly. The filler needs a clean surface to bond properly.
-
Step 2: Scoop some wood filler onto your putty knife. Start small — you can always add more.
-
Step 3: Press the filler into the scratch, working it deep into the groove. Use firm pressure to pack it completely. No air pockets allowed.
-
Step 4: Overfill slightly, as the filler will shrink as it dries. Apply it just above the table's surface and smooth with your putty knife.
-
Step 5: Now, we let it dry completely. Most fillers need 2 — 8 hours, but deep fills can take up to 24 — 48 hours. Check the package and take your time.
-
Step 6: Sand the filled area smooth with fine-grit sandpaper, following the wood grain. Keep checking with your hand until it's perfectly flush.
-
Step 7: Wipe away all sanding dust with a damp cloth and let it dry
-
Step 8: If the color doesn't match, apply wood stain or finish with a small brush or cotton swab. Let dry per product instructions.
-
Step 9: Buff with a soft cloth to blend the repair with the rest of the finish
Note: Wood filler is permanent once hardened. Double-check placement and color first. For major structural damage, large bare wood sections, or missing chunks, head to Method 6 (sanding & refinishing).

How to fix scratches on wood floor with wood filler
Photo: Freepik
Related blog: How to Remove Candle Wax from Wood
7. Sanding & Refinishing: Last Resort
Best for: Extensive damage, multiple deep scratches across a large area, or when all other methods have failed.
Sanding isn’t your first choice or even your fifth choice in how to fix wood scratches. Sanding removes the entire finish layer and potentially some of the wood itself. That means you’re committing to refinishing the whole surface.
When sanding actually comes in handy:
-
Multiple deep scratches across the entire surface
-
Finish already peeling, worn, or damaged in several spots
-
Methods 1 — 5 failed, and the scratch is still obvious
-
Wood is completely unfinished (no varnish, paint, or stain)
-
You're planning to refinish or restain anyway
How to get scratches out of wood with sanding:
-
Step 1: Clear the table and move it to a well-ventilated area or outside. Sanding creates tons of dust.
-
Step 2: Start with 120-grit sandpaper and sand the entire surface, not just the scratched area. Sanding one spot creates an uneven dip that's worse than the original scratch. ALWAYS sand with the grain, never against it.
-
Step 3: Keep sanding until the finish is removed and the scratch disappears. This takes 15 — 30 minutes, depending on table size and damage depth.
-
Step 4: Switch to 220-grit sandpaper and sand the entire surface again. This smooths out roughness and prepares the wood for staining.
-
Step 5: Wipe down the entire table with a tack cloth or damp rag to remove all sanding dust. Let it dry completely if you used water.
-
Step 6: Apply wood stain if your table was originally stained. Follow product instructions: brush on, let sit briefly, wipe off excess. Apply multiple coats if needed to match the original color.
-
Step 7: Let the stain dry completely (usually 4 to 8 hours — check the label).
-
Step 8: Apply protective finish (polyurethane, varnish, whatever matches your table's original coating). Most need 2 — 3 thin coats with drying time between layers.
-
Step 9: Let the final coat cure before use. Water-based finishes need 24 hours minimum, oil-based finishes need 72 hours for full hardness.
Note: Always check your product label for exact cure times. Different brands dry at different speeds.
-
Small spot repairs: Use the table normally after 24 hours, just avoid the repaired spots for 72 hours total.
-
Large refinishing jobs: Keep the entire surface untouched for 72 hours before any use.

How to remove scratches on wood table with sanding
Photo: Moses Restorations
Final reality check: If you’re reading this method and feeling overwhelmed, that’s normal. Sanding and refinishing is a real project, not a quick fix.
-
If the scratch isn’t that bad, try method 1 — 5 again. Sometimes a second attempt with a better technique works.
-
And if the table is valuable or you’re just not feeling confident, calling a furniture restoration professional is the smart move.
Read more: How to Repair Split Wood Table Top
5 Extra Tips for a Lasting, Perfect Finish
You’ve done how to get scratches out of wood floors or tables, nice work. Now let's keep it that way. These five tips prevent new damage and protect your table long-term.
-
Properly seal any repair you perform: After fixing the scratch, apply a light layer of furniture wax or wood polish over the area. This blends the repair and adds protection. Buff gently until the sheen matches the rest of the table.
-
Remove white rings with heat: White rings are water stains from trapped moisture, not scratches. To remove a water stain: place a dry cloth over the mark and iron on low heat (no steam) for 10 — 15 seconds.
-
Use protection like your table’s life depends on: Placemats, coasters, and felt pads aren't optional. They're armor against scratches. Felt pads prevent micro-scratching when things move around. Takes 30 seconds to add, and saves hours of repairs.
-
Dust and polish regularly (it matters): Dust is basically sandpaper, creating micro-scratches every time something drags across your table. Wipe weekly with a soft cloth, polish monthly. Preventive maintenance beats constant repairs.
-
Keep your table out of harm’s way: Direct sunlight fades and dries wood finishes, making them crack more easily. Use curtains or move your table. Skip harsh cleaners that strip protective finishes. Stick with wood-specific products or just a damp cloth with dish soap.

Dust and polish your table properly to prevent new scratches
Credit: Lumber Grand
Shop now: Round Wooden Epoxy Coffee Table 35" Diameter
You might like: Best Finish for Dining Table
FAQs
1. Is it Better to Repair or Replace Scratched Wood?
Repair almost always beats replacement. Most scratched wood tables are completely fixable at home in under 10 minutes using methods like walnut rub, furniture markers, or wood filler.
Replace only when the damage is extensive across the entire surface, there's structural damage, or repair costs approach replacement costs. A few scratches don't justify ditching a functional table. Fix it first, replace only as a last resort.
2. What Covers Scratches in Wood?
Walnut oils, furniture markers, repair sticks, and wood filler all cover scratches in wood. You just need to match the product to your scratch depth. Light scratches respond to natural oils (walnut, olive oil) or furniture polish. Deep scratches require wax fillers or wood filler paste to fill the groove. The key is using the right product for your specific type of damage. You can see methods 1 — 6 above for details.
3. How to Fix a Gouge in Wood Furniture?
Use a wood repair stick for a gouge in wood furniture if you’re doing a quick fix. Rub it into the hole until it is filled, smooth it flush, and buff.
If you’re refinishing the piece, use wood filler paste instead. Pack it in, let it dry completely, then sand it smooth. Stain and finish as usual. The filler becomes part of the wood structure and blends perfectly once refinished. See method 4 — 5 above for detailed steps.
How to Get Scratches Out of Wood: Guide Ends Here
We’ve walked you through six methods to get scratches out of a wooden table or piece of furniture. The reality is that most scratches you’re dealing with fall into the easy category. Methods 1 — 3 handle probably 80% of everyday table damage. Test your method on a hidden spot first, follow the steps, and don't panic if it takes two tries to get it right.
Remember those five bonus tips to prevent future scratches, and you'll spend much less time fixing damage going forward. And keep your pet’s nails trimmed every 3 — 4 weeks.
So that’s how to get scratches out of wood without losing your mind or money. Want more wood table care tips? Our blogs cover everything from maintenance guides to choosing the right wood for your lifestyle. Or if you're in the market for a quality wood table top built to handle real life, contact us — we'd love to help you find the perfect fit.


