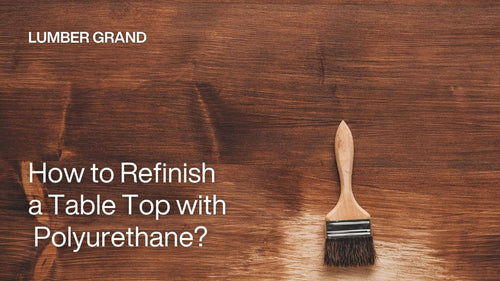
If your wooden table has seen years of use, chances are it’s covered in scratches, stains, or just looks dull. But before you consider replacing it, there’s an easy way to bring it back to life – learning how to refinish a table top with polyurethane.
This simple yet effective project can make an old table look brand new while adding a durable layer that will keep it looking great for years. Let's read more!
6 Needed Tools for Refinishing Table Top with Polyurethane
Preparing the required tools and materials prior to beginning the repair process is essential when researching how to refinish a table top with polyurethane. Having these items below will speed up the process and enhance the results:
1. Sandpaper: Use medium 80 to 120 grit sandpaper to help you get rid of old coatings and shortcomings, and fine grits 150 to 180 for a better finish
After that, you choose sandpaper with a grit of 360 to 400 to create an ultra-smooth surface. Please note that you should always sand in the direction of the wood grain to stay away from scuffs.

Grit Sandpaper Guide for how to refinish a table top with polyurethane
Credit: Lumber Grand
2. Tack cloth or microfiber cloth: Use a tack or microfiber cloth to wipe away any last bits of dust after sanding to ensure a clean surface for staining.
3. Paint brush: You should have a good, soft paint brush to apply the wood conditioner before using polyurethane for your table top. (Soft brushes deliver a smooth, brush mark-free finish)
4. Microfiber mini roller: We've tried different types of rollers and found that microfiber mini rollers give the best results for the polish polyurethane finish.
5. Wood conditioner: They are a classic pre-stain conditioner for furniture like tabletops, especially if you want a deep, vibrant stain color after that.
6. Polyurethane: When you're refinishing your table top, you need to select the right type of Polyurethane wood finish. The finish you pick will change how your table looks.
Since your table top gets used often and might have occasional spills, you want a finish that's strong and safe for food.
"For the non-pro, I'd recommend an oil-based wipe-on polyurethane," advises Norm Abram, a master carpenter. "It offers great protection, has the look of a hand-rubbed oil finish, and is easy to apply."
An oil-based polyurethane finish is a better choice than water-based polyurethane because it:
- Protects your table well
- Shows off the natural beauty and colors of the wood
- Oil-based polyurethane dries more slowly than water-based polyurethane. Hence, it‘s the best polyurethane for table top because it gives beginners more working time.
- Easier to use than other finishes like varnish or shellac
In the next part of our process of self-leveling polyurethane for table tops, we will reveal how many coats of oil-based polyurethane to apply to the table top. Let’s scroll down!

What you need to get started refinishing table top
Photo: ©MarieTDebs On Canva.com
Getting Ready for Table Top Refinishing with Polyurethane
Before you begin refinishing your table, you should make sure your work area is properly set up. This is a fun project, but safety and comfort are important considerations.
First, you need to find a place with plenty of fresh air. The sanding creates dust, and the finishes give off strong fumes that aren't good to breathe. So, your best options include:
- Your yard or patio for outdoor work
- Your garage with the doors wide open
- Any indoor space with all windows open and fans positioned to blow air outside
Next, you need to protect your floors from damage. Spread out some old sheets, cardboard, or newspaper under your entire work area. Refinishing can be messy, and drips are common during the process.

Prepare the workspace for table top refinishing with Polyurethane
Photo: Pixabay
To prevent back pain, you can raise your table to a comfortable height. We highly recommend that you use sturdy sawhorses (they work wonderfully) or any stable surface that brings the tabletop closer to waist level.
Besides, good lighting is essential so you can clearly see your work. A bright work light or a setup near a window during daylight hours will provide adequate lighting.
Four Steps on How to Refinish a Table Top with Polyurethane
Table top restoration is a satisfying project that can revitalize your furnishings. You can follow these simple steps to help you navigate the process:
Step 1: Prepare the Surface
You can’t skip sanding the table that you’re refinishing. It’s the only way to remove the old finish and make the surface smooth enough for staining.
Even if you start with a chemical stripper, you’ll still need to sand to get the table as flat and even as possible. This step is important because any mistakes in sanding will show up once you apply the stain to the table top.
First things first, you use a simple detergent and water to carefully clean the table to get rid of any last bits of oil, dirt, or old finish, then let it dry completely. After it has cured, you sand the entire surface using grit sandpaper to remove the old finish and any flaws.
Note: You don’t need to use every sandpaper grit available when moving from coarse to fine. Instead, you can jump from 80-grit to 120-grit, then to 180-grit, skipping the 100 and 150 grits completely.
When sanding wood, most professional carpenters usually stop at 150-grit for oak or walnut since they have coarser grain patterns. For cherry or maple, with their finer grain, they'll go up to 180-grit.

Choose the suitable grit sandpaper for table top restoration
Photo: Freepik
End grain is a whole different story, though. It shows every tiny scratch, so you might find yourself pushing to at least 220-grit, sometimes all the way to 360 for that glass-smooth finish you want.
And since knowing how to refinish a table top with polyurethane requires attention to every detail, don’t forget to wipe the surface clean with a tack cloth or microfiber cloth to remove any last bits of dust.
Step 2: Apply Pre-Stain Wood Conditioner
What type of wood is your table made from? Pine, birch, maple, and cherry are notorious for soaking up stain like crazy in some spots while barely absorbing it in others.
After ruining a few wood projects, we started using pre-stain conditioner on thousands of handcrafted wood table tops. It makes such a difference to get that smooth, even color we're after.

Apply pre-stain wood conditioner
Photo: Bricoman
Step 3: Apply Polyurethane
Our carpenters have tried with tons of clear finishes over the years, but they keep coming back to polyurethane. Nothing else can give you that perfect balance of easy application and tough-as-nails durability. Moreover, that subtle amber tone really warms up most woods nicely.
As we mentioned above, a microfiber mini roller with polyurethane is the best couple for how to refinish a table top with polyurethane. When using polyurethane on large surfaces, you have to race against time before it gets sticky.

Microfiber mini roller is one of the best tools for polyurethane table top refinishing
Photo: Family Handyman
But with these rollers, they're quicker and almost foolproof. By the way, don't panic about all those bubbles when you first roll it on. They vanish within minutes and leave a smoother finish than you've ever managed with a brush.
We suggest putting at least three polyurethane coats on the table top now. The thicker protection means less chance of damage to the actual wood underneath, so your piece stays looking great longer. Plus, when it's time to refresh the finish, it's so much easier.
Step 4: Final Touches
Lastly, we need to check the surface for dust particles or uneven regions after applying the polyurethane. You can sand it lightly and then apply a finishing coat if necessary. To make sure the finish sets properly, please let the table dry for a few days after you're satisfied.
Tips: Don’t use wax after refinishing. Instead, you can wipe your table clean with a damp cloth. It’s that simple. Over time, if the finish loses its luster, you can easily refresh it with a quick coat of wipe-on poly. (Note: If you’ve used wax or polish in the past, the new poly may not adhere properly.)

Finishing touches for a lasting shine
Photo: ©BanksPhotos on Canva.com
3 Must-Know Maintenance Tips for Your Refinished Polyurethane Table Top
Learning how to refinish a table top with polyurethane extends its lifespan and maintains its attractiveness. Here are some professional care tips to keep any surface feeling fresh.
- Use coasters and placemats: Keep the surface safe from scratches, heat, and moisture rings. Remind visitors to use trivets for hot food and coasters for drinks. These easy barriers reduce daily wear and strain.
- Clean up spills immediately: Blot spills to prevent liquids from soaking into the grain and spreading. Next, use a gentle cleaning solution that is suitable for the material of the tabletop. Long-term damage and discolouration can be avoided with immediate action.
- Avoid harsh chemicals: Avoid using abrasive or acidic products since they can peel, dull, or etch surfaces. Initially, test new cleaners in a discrete location.
FAQs
1. Can you apply polyurethane over old polyurethane without sanding?
While it’s possible, we don’t recommend skipping the sanding step. Lightly sanding the old finish (even just a quick scuff with 220-grit sandpaper) helps the new polyurethane bond properly. Otherwise, the fresh coat might peel or bubble over time.
2. Do you have to sand after every coat of polyurethane?
Yes, but don’t worry, it’s easier than it sounds. A very light sanding with fine sandpaper (320-grit or higher) between coats smooths out dust nibs and brush marks. Then, just wipe away the dust afterward with a tack cloth.
3. Is polyurethane a good finish for a table top?
Absolutely YES! Polyurethane is one of the most practical finishes for tabletops. It stands up to daily use, such as spills, hot dishes, or even the occasional crafting mishap.
4. How to refinish a table with polyurethane?
Here is how to refinish table with polyurethane:
Step 1: Strip or sand off the old finish (yes, this part’s messy but worth it).
Step 2: Pre-stain and then stain the wood if you want a color change (optional).
Step 3: Apply at least 3 thin coats of polyurethane with a roller, sanding lightly between coats.
Step 4: Let it cure fully (about 72 hours) before using the table.
That is everything with Lumber Grand’s comprehensive guide on polyurethane table top refinishing for professional advice and reliable techniques. For individualized guidance or assistance with your refinishing project, you can contact us at contact@lumbergrand.com, and we will assist you through the entire process.
Learn how to refinish a table top with polyurethane to give your furniture a new look and a durable safeguard. Any wooden surface can be made more beautiful and durable by following the proper procedures.

