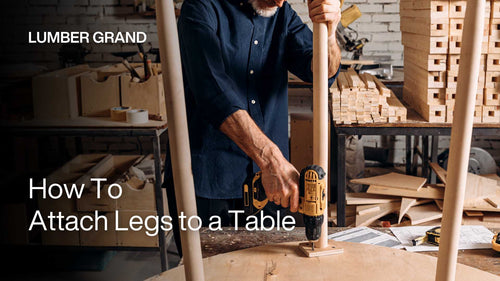
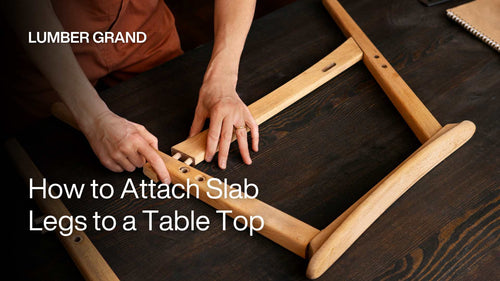
Finding how to attach slab legs to a table top? Don't worry, it's easier than you think. At a glance, to attach slab legs to a table top, you’ll need to drill a few bolts, and a little patience, you can get this done in an afternoon. The secret lies in using threaded inserts that screw right into the wood and you’ll have a clean, strong connection that'll last for decades.
Lumber Grand has helped many folks just like you tackle this project. Some are handy with tools, others have never drilled a hole in their life. Either way, you can do this. Our 6 quick steps on how to attach table legs with bolts below show you exactly what to do, with pictures and simple instructions. Let's get started!
Key Takeaway to Attach Slab Legs to a Table Top
Here’s a quick overview of why we recommend using bolts and threaded inserts for slab legs:
-
What makes these wooden table leg attachment methods different? Threaded inserts create a more robust joint than regular screws (get loos over time), especially if you're working with softer wood like pine. Still, insert stays put in the wood, and your bolt screws into that. So even years down the road, when your grandkids are climbing on that table, everything stays rock solid.
-
Can this work without full drilling? Yes. You only need shallow pilot holes for the inserts. This avoids damage to epoxy or live-edge slabs.
-
How long does this take? You can finish attaching slab legs to a table top in under 20 minutes. Most of the time is spent marking and drilling the holes. If you start with the right tools and measurements, each leg takes just a few minutes to align and bolt in.
-
What do we show you? We will see how to attach slab legs to a table top in the simplest way that everyone can follow easily, even if you’re a beginner.
How To Attach Slab Legs to a Table Top in Just a Few Minutes
Follow our simple 6-step guide on how to attach legs to a table without apron, and you can complete it in under 20 minutes.
Step 1: Tools & Materials You'll Need for Attaching Slab Legs to a Table Top
Before you begin, we need to gather these tools and materials. You can find most of them at a hardware store. They’ll help you drill precise holes and install your legs cleanly:
|
Item |
What is it used for |
|
Threaded inserts (M6–M8) |
Embedded anchors that receive the bolts |
|
Matching bolts |
Secure the legs to the inserts without surface screws |
|
Drill: 1 |
Create insert and bolt holes |
|
Bits: 3 |
1. Bolt-sized bit (for bolt clearance hole through tabletop) 2. Insert outer thread-sized bit (shallow, wider hole) 3. Insert core bit (narrow, deep hole for insert threading) |
|
Painter’s tape |
Mark drill bit depth to prevent over-drilling |
|
Socket wrench or driver |
For driving inserts into the wood |
|
Washers (optional) |
Help distribute pressure evenly under bolt heads |
|
Clamps and measuring tape |
Keep the leg stable and aligned while marking and drilling |
Note: You may also want a clean pencil and masking tape to label legs and avoid mix-ups.
Step 2: Drill 2 Holes into Each Table Leg Plate
We first lay each slab leg upside down and drill 2 bolt holes in each leg's top plate. How many holes will depend on the design. The reference numbers are based on our slab table legs.
-
First, you use a pencil and ruler to mark evenly spaced holes across the top plate. Stay 2–4 cm away from the plate edges to prevent splitting.
-
Next, you clamp the plate securely to your work surface.
-
Then, you drill through each mark using the bolt-sized bit, holding the drill at a 90° angle to keep the hole straight.
Note: You repeat the process for each leg. These holes are where your bolts will pass through into the tabletop inserts.

Drill bolt holes into each table leg plate will help your table stay sturdy
Photo: Freepik
We once skipped clamping during a tight deadline project, and the tear-out nearly ruined a walnut top. Therefore, you don’t skip this step if you want a sturdy table top.
Step 3: Mark and Align 2 Slab Legs Positions on the Table Top's Underside
Once you’ve drilled holes into each leg plate, we can continue:
-
First, you flip the leg over and place it where you want it on the underside of the table top.
-
After that, you use a pencil to trace the outer corners of the leg plate.
-
Press a pencil or screwdriver through each bolt hole to mark the exact drill spots for your inserts.
-
Label each leg (“Front Left,” “Back Right,” etc.) so you can place them accurately later.
This step helps keep the legs square, balanced, and in the right position for final attachment.

Mark and align the leg positions on the underside of the table top
Photo: Freepik
Step 4: Drill 4 Holes in Table Top for Installing Threaded Inserts
For this setup, you'll drill 4 total holes on the underside of the table. But each hole will have two depths: a shallow opening for the insert’s collar, and a deeper center for the threads.
-
You start each hole using a wide bit that matches the outer threads of your insert.
-
First, you drill a shallow hole with a wider bit about 10 mm deep (for the insert threads to sit flush)
-
Then, you can drill deeper with a narrower bit about 10–15 mm more (for inserting the body)
-
Wrap painter’s tape around your bits to control depth and avoid drilling too far
This two-stage hole makes sure the insert sits flush while gripping tightly. It also protects thinner wood slabs (especially epoxy wood) from cracking or blow-out.
Step 5: Install 4 Threaded Inserts (2 per Leg for 2 Legs)
Once your 4 holes are drilled and ready, it’s time to install the threaded inserts, one per hole. We recommend that you place a nickel over the insert to help drive it evenly using a standard driver.
Each insert should sit perfectly level with the surface. If any insert starts to tilt, you back it out and correct the angle. You should take your time in the process. The cleaner the installation, the better your final result
Step 6: Attach Slab Legs to the Table Top Using Bolts and Washers
At the last step in how to attach slab legs to a table top guide, you continue:
-
Place each leg over its original traced outline and line up the bolt holes with the installed inserts.
-
Drop a washer onto each bolt, then hand-thread them through the leg plate and into the inserts. Once everything lines up, you can tighten each bolt with a wrench.
-
Use even pressure and don’t over-tighten. Once the bolts are in place, you flip the table upright and press on each corner to check for wobble.
When compared to using surface screws or brackets, this method gives you a cleaner finish and better long-term strength. Moreover, it also makes future disassembly easy if you ever want to swap bases or move the table.

Lasly, we attach 2 slab legs to the table top by using bolts and washers
Photo: Freepik
Why You Should Choose Threaded Inserts for Attaching slab legs to a table top?
Threaded inserts offer a strong, stable way to fasten slab legs without using exposed screws or bulky brackets. If you’re looking for how to attach legs to a table without apron, but want a cleaner result, threaded inserts give you that connection from underneath.
Here are the reasons:
-
You can remove and reattach the legs anytime. That makes it easier to move the table or switch out the base later.
-
The inserts distribute weight across a wider area, so you're not putting pressure on just one point like with surface screws.
-
This method works well with live-edge slabs, hardwood, or epoxy table. It doesn’t require a skirt, apron, or support frame.
-
From the underside, the table stays clean and uncluttered. You won’t see any brackets or corner plates.
-
The holes are shallow and hidden, so the surface stays intact with minimal damage.
Learn more: How to make a wood table top?
4 Alternative Methods to Attach Slab Legs to Table Top
Now that you know why you should use threaded inserts, we'll introduce you to 4 alternatives to give you a better overview. If you're researching how to attach round legs to a table, you’ve probably come across other fastener methods.
Some of these may work in certain situations, especially for lightweight tables. But when it comes to heavier slab tops, especially live-edge or epoxy tables, they tend to fall short in strength or stability.
|
Method |
Why It Falls Short for Slabs |
|
Figure 8 fasteners |
Allow wood movement, but hard to install evenly on epoxy or curved surfaces. |
|
Z-clips or Rockler table top fasteners |
Routed grooves or aprons are required, but they aren’t available on most slabs. |
|
Brackets and screws |
Often visible from the sides, it disrupts clean designs and minimalist bases. |
|
Glue-only / no-drill options |
Weak bond under weight; not reliable for frequent use or transport. |
Note: If you're searching how to attach table top to base without screws, these may work for lightweight tables - but for slab-style durability, we recommend threaded inserts.
Additionally, you can refer that Lumber Grand's epoxy table tops are pre-finished, durable, and easy to match with most standard leg systems for those who do not want to install them themselves. We’ve seen customers spend hours trying to align metal bases on uneven slabs, only to find our epoxy tops already come flat, prepped, and sealed.
FAQs
1. How to Attach Legs to a Table Top?
The easiest way to attach legs to a table top is using threaded inserts and bolts. First, we mark where your legs go on the bottom of your table. After that, you drill holes into the leg plates, screw in the threaded inserts, then you bolt everything together.
2. How Do You Attach Legs to a Table Without Screws?
You have 3 best options to attach legs to a table without screws:
-
Wood glue works great if you're never planning to take the legs off. You just need to clamp everything together and let it cure for 24 hours.
-
Another way is using metal brackets that slide or clip into place, kind of like how some office furniture goes together.
-
There are also specialty connectors that twist-lock into place. But, we highly recommend using the threaded insert method because it's strong AND you can take it apart if you ever need to move.
3. What is the Best Glue for Wood Table Legs?
If you're going the glue route, Titebond III is your friend. It's waterproof, incredibly strong, and dries clear. Gorilla Glue also works well, but it can foam up a bit, so you'll want to clamp everything nice and tight.
4. How to Attach Legs to a Granite Table Top?
Granite's a whole different animal and you can't just drill into it like wood. You'll need special diamond-tipped bits and a lot of patience. Most people use metal mounting plates that get glued to the granite with structural adhesive, then attach the legs to those plates.
However, unless you've got experience with stone work, this is probably a job for a professional. One wrong move and you've got an expensive pile of broken granite.
Conclusion
More DIY guides are available on the Lumber Grand blog, along with expert tips on building, refinishing, and choosing the best table top. You can also explore our collection of 300+ handcrafted table tops, ready to pair with the base of your choice.
Sum up, learning how to attach slab legs to a table top gives you the chance to create a sturdy, beautiful table that fits your space and style. Whether you’re working with live edge, natural, or epoxy wood, the right attachment method makes a difference in both appearance and durability. Thanks for reading, and good luck with your table project!


