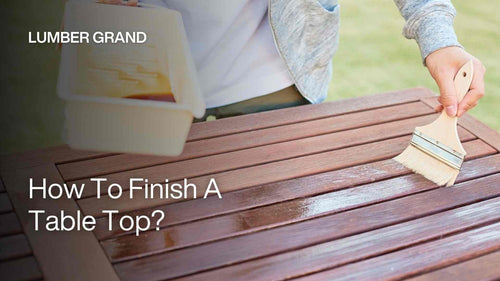
How thick can you pour table top epoxy? Lumber Grand will guide you through the essential limitations and solutions for epoxy pouring. With the right thickness, you can possess the key to easily achieve your flawless finish and gain more confidence in creating more creative epoxy projects in the future.
How Thick Can You Pour Table Top Epoxy?
The recommended pour thickness for the majority of table top epoxy products is 1/8 to 1/4 inch per layer. This is a safe thickness that will allow the epoxy to cure efficiently without producing heat or other problems.
Because epoxy has the special ability to self-level, you only need to apply a thin layer, and it will spread out equally. It is always better to pour several thin layers and allow each to partially cure before adding the next one if a thicker coat is wanted.
 Epoxy table top with the right epoxy thickness is the key to a flawless finish
Photo: ©Pavlo Tsunik on Canva.com
What Happens If You Pour Epoxy Too Thick?
The desire to work faster often leads to damage when epoxy is applied in excessive amounts. Epoxy demands thin layers of application since excessive thickness leads to issues with both visual appeal and quality. Here's what will happen if you pour it too thick:
-
Overheating and exothermic reactions: The heat generated by thick epoxy applications frequently results in yellowing and triggering both exothermic reactions and smoke production. This will not only ruins the finish but can also be dangerous for you.
-
Air bubbles and trapped moisture: When you pour epoxy that is too thick, air bubbles are more likely to get trapped inside, resulting in bubbles or cloudy spots that ruin both appearance and smoothness.
-
Uneven curing and soft spots: The thicker the epoxy pour becomes, the greater the challenge for heat to evenly cure your entire mixture, and this results in soft areas, which can be very hard to fix.
-
Cracking and structural weakness: Unregulated treating and uneven curing procedures generate excess strain in resin which creates lengthy cracks and weak points that eventually result in breakage. In some cases, you may have to scrape off the affected areas and re-pour to fix it.
 Pouring your epoxy too thick can lead to many problems like cracking, trapped air bubbles
Photo: Third Man on pexels.com
Read more: How long does epoxy take to dry on a table?
How to Fix an Epoxy Overpour?
Even if you know the answer to “how thick can you pour table top epoxy?”, sometimes, accident happens. When you have mistakenly poured your epoxy too thick, there is no need to panic. You can fix the problem by following these easy steps:
-
Let it cure fully: Despite whether curing is slower than normal, it's best to let the epoxy cure completely. Rushing this process can cause uneven results or prevent it from hardening effectively. Patience is key!
-
Sand the surface: After curing, inspect the epoxy for any imperfections, i.e., unevenness, air bubbles, or rough patches. Sand these spots with sandpaper. Start with a coarser grit and finish with a finer one for a high-gloss finish.
-
Apply a thin layer of new epoxy: Once the surface has been sanded, apply a new thin coat of epoxy to create a smooth, glossy surface. The new coat should be thin enough not to result in another overpour but thick enough to cover sanding marks.
-
Use a heat gun or torch: The application of a new topcoat requires either a heat gun or a torch to pop air bubbles from the surface. Move the torch or heat gun at a distance of several inches above the surface while mining it across the epoxy to burst bubbles and produce a clear finish.
-
Scrape and re-pour if necessary: As a final option, gently scrape off the soft spots, then pour fresh epoxy into the spots you removed to fix the damaged areas. Repairing the surface smoothness and strength is possible through these methods.
 Overpouring epoxy can be fixed easily by many techniques
Photo: ©sandsun on Canva.com
How to Prevent Air Bubbles in Thick Epoxy Pours?
Air bubbles are one of the most common issues when working with thick epoxy pours. These tiny air pockets will ruin the look of your table top and weaken its strength. Keeping your epoxy crystal clear and smooth is as important as focusing on how many gallons of epoxy for river table that you should use. Luckily, with the right procedures, you can keep the finish your epoxy project flawless.
1. Epoxy Seal Coats
This first thin coat seals the surface and fills in small gaps, which is especially important with porous wood in projects such as river tables. Sealing helps prevent trapped air in the wood from escaping and causing bubbles when the main epoxy is poured.
Wood and porous materials are prone to trapping air, causing bubbles in the epoxy if not pre-treated. A sealant coat eliminates this, resulting in a clear, defect-free finish.
 A seal coat will minimize the air bubbles in your epoxy project
Photo: ©sandsun on Canva.com
2. Heat Gun or Torch for Bubble Removal
To remove air bubbles from epoxy, hold a heat gun a few inches above the surface and move it slowly and evenly across the area. The gentle heat will pop trapped bubbles and help the resin settle into a smooth, glassy finish. Be careful not to hold the heat in one spot too long, as it may cause yellowing or burn marks. Combining this with a proper seal coat ensures a bubble-free, professional-looking result.

Using a propane torch can help smooth out epoxy surface with air bubbles
Photo: ©Collab Media on Canva.com
Reach out to us at contact@lumbergrand.com for expert advice, or explore our blog for more epoxy tables tutorials.
Now you know how thick can you pour table top epoxy and how to avoid common issues like overheating, bubbles, and uneven curing. For best results, pour 1/8 to 1/4 inch per layer, or use deep pour epoxy for thicker projects. Need help choosing the right product? Lumber Grand is here to help bring your creative designs to life!


