How to make an epoxy river table sounds harder than it actually is. If you follow the steps and take your time, you can end up with something that looks really professional. It's the kind of piece that people notice right away when they walk into a room.
Today, Lumber Grand is going to show you the whole process of how to make a river table epoxy, from picking out your wood to putting on the final coat. We'll also share some of the tricks that make the difference between an okay table and epoxy table with that smooth, glass-like finish. Let's get started!
Gather Materials & Tools for Epoxy River Table DIY Project
First, let's go over what you'll need to make this epoxy resin diy river table. You don't have to buy a ton of equipment to pull this off.
1. Wood
The wood you pick matters a lot. If this is your first time making a river table, here are some good options:
-
Walnut: Dark wood that looks great next to bright epoxy colors
-
White Oak: Strong, easy to find, and has nice grain patterns
-
Maple: Lighter color that makes the epoxy stand out more
-
Rough-cut lumber from local sawmills: More budget-friendly, and you're supporting small businesses
For a console or dining table, get a slab that's 6 to 8 feet long and about 1 to 2 inches thick. You can use a natural live edge slab or make your own edge from regular lumber. Either way works fine.
2. Epoxy Resin
This part trips up a lot of people starting out when learning how to make an epoxy river table. There are two main types of epoxy resin you can use:
-
Deep pour epoxy: We can pour this up to 2 inches thick all at once. That's really helpful for diy river table because you fill the whole channel in one go instead of doing multiple layers and trying to match the color each time. WiseBond Deep Pour and TotalBoat ThickSet both work well.
-
Standard tabletop epoxy: You have to pour this in thin layers, about 1/4 inch at a time, and wait between each one. It costs less but takes longer.
If you're making a 7-foot wood table with epoxy river that's 3 to 4 inches wide, plan on using around 2 to 3 gallons of epoxy.
3. Form & Prep Materials
-
Melamine board or plywood (for building the epoxy pour table mold)
-
Tuck tape, Tyvek tape, or sheathing tape (to prevent epoxy from sticking)
-
Clear silicone caulk (for sealing seams)
-
Pigments or colorants (metallic powders, liquid dyes, or acrylic paint)
4. Essential Tools
|
Category |
Item |
Purpose/Notes |
|
Minimal Tool Approach |
Jigsaw |
Cutting the river channel and shaping edges |
|
Electric hand planer |
Flattening the wood surface |
|
|
Cordless drill |
Various tasks including buffing |
|
|
Random orbital sander |
Smoothing and finishing |
|
|
Standard Power Tool Setup |
Table saw or circular saw |
Wood cutting |
|
Router with 2-inch planing bit |
Surface preparation |
|
|
Belt sander or thickness planer |
Surface leveling |
|
|
Angle grinder with sanding disc |
Removing router lines quickly |
|
|
Additional Equipment |
Propane torch or heat gun |
Vital for bubble removal |
|
Mixing containers and stir sticks |
Epoxy preparation |
|
|
Measuring cups |
Accurate resin mixing ratios |
|
|
Foam brushes |
Epoxy application |
|
|
Buffing pad attachment for drill |
Final polishing |
|
|
Sandpaper |
80, 120, 150, 220, 400, 1000, 1500, 2000, 4000 grit progression |
|
|
Safety Gear (Non-Negotiable) |
Respirator or N95 mask |
Protection from harmful epoxy fumes |
|
Nitrile gloves |
Protect skin from resin |
|
|
Safety glasses |
Prevent splashes during mixing/pouring |
|
|
Well-ventilated workspace |
Open windows or use fans |
How to Make an Epoxy River Table Step by Step
Now that you've got everything assembled, it’s time to dive into how to make a DIY epoxy river table in 10 days. Our beginner-friendly guide covers wood prep, epoxy pouring, sanding, and finishing. Let's start building your epoxy resin DIY river table!
Step 1: Select and Prepare Your Wood (Day 1)
-
Sourcing your lumber: When you're picking out a slab, look for the best wood for table top with interesting grain, natural curves, or things like knots and burls. A lot of people think those are flaws, but they actually end up being the coolest parts of the table once it's done.
-
Initial cutting: Cut your slab to whatever length you want. Most dining tables are somewhere between 6 and 8 feet. Console tables are usually shorter, around 4 to 5 feet. We use a circular saw or table saw to get clean, square cuts on both ends.
-
Creating your live edge: If you're working with dimensional lumber rather than a live edge slab, you can create a beautiful faux live edge.
-
Grab some 40-grit sandpaper and your orbital sander. Then, use it to carve out curves along the edge so it looks more organic.
-
If there are any dents or chips in the wood, just work them into the shape instead of trying to hide them. After you get the shape you want, smooth it out with 120-grit sandpaper, then finish with 220-grit so it feels nice to touch.
-
Step 2: Flattening the Wood Surface (Day 1)
-
Secondly, you need a flat surface, or your epoxy pour is going to be uneven. There are a couple of ways to do this.
- Router sled: You can build a router sled jig or buy one. Run it across the wood, taking off about 1/16 inch at a time. Go slow because this takes a while, especially on a big slab.
- Hand planer: An electric hand planer works too. Simply take down the high spots and always go with the grain so you don't tear up the wood. Continue checking with a straight edge as you go.
- Getting rid of router lines: The router leaves little ridges in the wood that you have to smooth out. One of the quick ways is to use an angle grinder with a 50-grit metal sanding disc. Keep it moving so you don't accidentally create dips in the wood.
- Removing router lines: The router leaves ridges in the wood that you need to get rid of. An angle grinder with a 50-grit metal sanding disc works really well for this. Just keep it moving so you don't accidentally grind dips into the wood.
- Initial sanding: Start with 80-grit sandpaper and work your way up through 120, then 150, and finish with 220-grit. After you're done sanding, blow off all the dust with compressed air or vacuum it up. Then, you wipe everything down with a tack cloth. Any dust that's left behind will show up as little imperfections once you pour the epoxy.
You might like: How to Make an Epoxy Table
Step 3: Design and Cut Your River Channel (Day 1)
There are a few different ways you can do the river:
-
A flowing curve that looks like a real river with gentle bends
-
A straight line down the middle for a more modern look
-
Two or more thin rivers instead of one
-
Put the river off to one side instead of right in the center
Draw your design on the wood with chalk or a pencil. If this is your first time learning how to make an epoxy river table, we recommend that you stick with a simple curve. It's easier to pull off and still looks really good.
Now, let’s dive into the cutting process:
-
With a jigsaw: Follow the line you drew and let the saw do the work. Don't force it. If you have tight curves, drill some holes first so the blade has room to turn. You can also make straight cuts from the edge to your curved line to help get around sharp corners.
-
Another way to do it: If you have a table saw, you can cut the slab straight down the length, then separate the two pieces to create the gap for the river. This gives you perfectly straight edges on the inside.
-
How wide should the river be? With a table that's 6 to 8 feet long, a river that's 3 to 5 inches wide looks about right. If you go narrower, like 2 to 3 inches, it looks more delicate. Wider rivers, around 6 to 8 inches, really stand out.
-
Setting up your pieces: You put wood pieces so that the straight cuts you just made face each other across the river gap. The live edges or the edges you shaped should be on the outside of the table. That's what gives you that classic look where the wood frames the epoxy in the middle.
Step 4: Build Your Form/Mold (Day 1 — 2)
-
Firstly, you cut some melamine board pieces to go around your wood. The sides should be 2 to 3 inches taller than your wood is thick. Screw the pieces together so they make a rectangle with your wood sitting inside. You should leave about an inch of space around the wood on all sides.
-
Next, we seal it up because that's where leaks happen. Run silicone caulk along every seam where the sides meet the bottom and where they meet each other. Use a wet finger to smooth it out and make sure it's sealed completely.
-
After that, cover the bottom and inside walls with tuck tape. Some people call it Tyvek tape or sheathing tape. It keeps the epoxy from sticking to the mold. Overlap the tape by at least 3 inches wherever pieces meet.

How to make an epoxy river table — Step 4
Photo: YouTube | Blacktail Studio
Step 5: Apply Seal Coat (Day 2)
Wood has tiny holes in it, especially where you cut it. So, if you don't seal it first, air bubbles keep coming out of the wood and going into your epoxy while it cures. The wood also soaks up epoxy like a sponge, which gets expensive.
You'll be standing there with a torch trying to get rid of bubbles that just keep forming. Sealing the wood first can save you 20 to 30% on epoxy. Here is how to do it:
-
Mix up a small batch of clear epoxy, about 8 to 12 ounces. Don't add any color yet. You use a foam brush to put it on all the wood surfaces that are going to touch the colored epoxy. It’s advised to pay extra attention to the cut edges, any knots or cracks, and the edges along the river channel.
-
Work it into the wood and add more to spots that soak it up fast. Next, you let it cure all the way, at least 24 hours. Once it's hard to the touch, you can move on to the main pour.

How to make an epoxy river table — Sealing the wood can save you 20 to 30% on epoxy
Photo: YouTube | Blacktail Studio
Pro tips: If your wood has deep knots or holes, you should fill the bottom part with clear silicone caulk or wood glue before you do the seal coat.
Step 6: Mix Epoxy with a Ratio of 1:1 (Day 3)
In the 6th step of how to make river table epoxy, we’re going to calculate deep pour epoxy coverage to make the river table. This is what to do before you pour epoxy:
1. Measure your river channel (not the whole table)
-
Length × Width × Depth. That gives you cubic inches. Then convert it to ounces.
-
One cubic inch equals about 0.554 fluid ounces. Add 10% extra for overfill and mistakes.
-
So if your river is 72 inches long, 4 inches wide, and 1 inch deep, that's 288 cubic inches, which is about 160 ounces, or around 1.25 gallons.
2. Pick the epoxy color: Some colors people use a lot, such as
-
Turquoise or ocean blue
-
Black with metallic flakes
-
Emerald green
-
Just clear if you want the wood to stand out
Suppose you're using metallic pigment powder, go easy because it's really concentrated. Start with 1 or 2 tablespoons per gallon, mix it in, and add more if you need to. It'll look way darker once the river is an inch deep.

How to mix glow epoxy resin table diy — epoxy pouring for beginners
Photo: YouTube | Blacktail Studio
3. Mixing the epoxy
-
You’ll need to use one container. Don't measure Part A and Part B in separate cups and then pour them together. Pour both parts into the same mixing container. That's the only way to get the ratio exact.
-
Follow the ratio your epoxy says. Most are either 1:1 or 2:1 by volume. Read the instructions. If you're even a little bit off, you'll end up with spots that never harden all the way.
-
Stir it for at least 3 to 5 minutes. Keep scraping the sides and bottom. It might get warm. That's normal. Your arm will get tired. That's also normal and means you're mixing it enough.
-
Once the resin and hardener are completely mixed, add your pigment powder or dye. You stir for another full minute so the color gets mixed in evenly.
-
Before you pour, run your torch over the epoxy. This gets rid of bubbles that formed while you were mixing. Fewer bubbles going in means less work later getting them out.
Step 7: Pour Your Epoxy and Remove Bubbles
1. If you're using deep pour epoxy (2-inch single pour):
-
Hold your container about 6 to 8 inches above the mold when you pour. Pouring from too high adds air bubbles. Start at one end and pour slowly across. Let the epoxy flow into the corners and edges on its own.
-
Fill it just a little over the top of the wood, maybe 1/8 inch above. Epoxy shrinks a bit when it cures, so this extra makes up for that.
-
Deep pour epoxy levels itself out. Don't worry if it looks uneven right after you pour. Give it 5 to 10 minutes, and it'll settle flat.

How to make an epoxy river table — Pouring epoxy
Photo: YouTube | Blacktail Studio
2. If you're using regular epoxy (1/4-inch layers):
-
You need to pour about 1/4 inch into the river channel.
-
Torch out the bubbles.
-
Wait 3 to 4 hours for it to set up, but not cure completely.
-
Then pour another 1/4 inch layer and torch again. Keep doing this until you get to the height you want.
The thing about deep pour epoxy is that the color stays consistent all the way through. When you do multiple layers, even tiny differences in color show up as lines in the finished river.
Besides, while you're pouring, you can add some effects if you want. The epoxy keeps moving and making patterns for the first hour or two while it levels out. That's why every river table ends up looking different.
Step 8: Curing Process (Days 4 — 7)
-
A regular wood table with epoxy river takes about 24 to 48 hours before it's hard enough to take out of the mold.
-
Deep pour epoxy needs 3 to 4 days before you can use tools on it.
Both types take up to 14 days to fully cure and reach maximum hardness.
In those days, you should keep the room at 70 — 75°F. If it's too cold, the epoxy might not cure right. If it's too hot, it can crack from curing too fast.
Also, if you can wait an extra day or two past when it feels ready, do it. The harder it is, the easier it sands and polishes epoxy later.

How to make an epoxy river table — epoxy curing stage
Photo: Lumber Grand
Step 9: Demolding and Initial Flattening (Day 5 — 7)
Now, you get to see what it looks like outside the mold.
-
Unscrew the sides of your melamine form and take it apart. Peel off the tuck tape. It should come off pretty easily.
-
Use a scraper to get rid of any silicone or caulk that's stuck on the edges. You'll probably see some epoxy that overflowed on top where it rose above the wood. That's what's supposed to happen.
-
Making the top flat: The top won't be completely flat yet. The wood and epoxy will be at slightly different heights. You need to level it out.
-
With a planer: If you have a thickness planer, run the table through it and take off about 1/16 inch at a time. This is the fastest way to get the extra epoxy off. Just make sure the whole table is supported so it doesn't flex.
-
With a router sled: Use the same router sled you used earlier. Make light passes over the wood and epoxy.
-
With a hand planer: Leverage an electric hand planer carefully on the epoxy. Keep it moving so you don't accidentally gouge the surface. Go slow and check your progress with a straight edge.
Step 10: Sanding Progression (Days 7 — 8)
In step 10th of how to build a resin river table, you’ll see the table go from rough to finished.
1. Dry Sanding (80 to 400 Grit)
-
80 Grit: Only use this if you need to take off a lot of material. Keep your sander moving because wood sands way faster than epoxy. Be careful near the edges.
-
120 Grit: This gets rid of the scratches from the 80 grit. Continue until everything feels smooth. Wipe it with a damp cloth to see if there are scratches you missed.
-
150 Grit: Gets rid of the 120-grit scratches. The surface should start looking less rough.
-
220 Grit: This is your last step for dry sanding. The wood should feel really smooth. The epoxy will still look scratched up. That's normal.
-
320 to 400 Grit: You don't have to do this, but it helps. It gets the surface ready for wet sanding and makes that part go faster.
Note: We advise you NOT to skip grits when you're sanding epoxy. Wood is more forgiving, but epoxy shows every scratch. If you go straight from 120 to 220, those 120-grit scratches will still be there at the end.
2. Wet Sanding (1000 to 3000 Grit)
Next, you get a bowl of warm, soapy water. You'll also need clean rags and wet/dry sandpaper in 1000, 1500, 2000, and 3000 grit. If you have a sanding pad for your drill, that can help too.
-
1000 Grit: Dip your sandpaper in the soapy water and sand in overlapping circles. Keep the surface wet the whole time. Wipe it off every so often to check how it's going. The epoxy should start clearing up a little.
-
1500 Grit: Change to fresh water. Do the same thing. The epoxy should be noticeably clearer, and the scratches should be really fine now.
-
2000 Grit: Fresh water again. The epoxy is starting to get glossy. You might see reflections in it.
-
3000 Grit: This is optional, but it gives you the clearest results before polishing. The epoxy should look almost like glass.
Between each grit, you should dump out water and refill it with fresh soapy water. Wipe the whole surface with cotton balls and rubbing alcohol to get rid of all the sanding debris. Also, check for scratches by looking at it from different angles.

How to make a epoxy river table — wet sanding step
Photo: ©Stipe Perkovic on Canva.com
Don’t skip: Glow Epoxy Resin Table: Complete DIY 16 Steps
Step 11: Polish the Epoxy River (Day 8 — 9)
Here, you're going to make the epoxy look like glass. Below is the process of the polishing compound method:
-
You'll need automotive polishing compound. Meguiar's Ultra Cut Compound 105 works well, or something similar. You also need a buffing pad that attaches to your drill and some microfiber cloths.
-
Squeeze about a tablespoon of compound right onto the epoxy. Put a few drops on your buffing pad, too. Turn your drill to low speed and spread the compound over the whole epoxy surface. Cover it evenly.
-
For the first pass, set your drill to low-medium speed, around 1000 to 1500 RPM. Press down firmly and work in small sections, maybe 12 by 12 inches. Move in overlapping circles. The compound will go from white to clear as you work.
-
For the second pass, turn your drill up to medium-high speed, around 2000 to 2500 RPM. Use really light pressure this time and let the pad do the work. Go over the same areas again. This gives you that final glossy finish.
-
Wipe off all the compound with a clean microfiber cloth when you're done.
What it should look like after polishing:
The epoxy should look like glass now. Clear enough that you'll think it's still liquid. You should see perfect reflections in it. If you used metallic flakes, they'll shimmer and catch the light.
Alternative: flood coat method
Some people skip the sanding and polishing and just do a flood coat instead.
-
After you sand to 220 grit, put on 2 or 3 thin seal coats of epoxy.
-
Then mix up a final batch of clear epoxy and pour it over the whole surface.
-
Let it flow and level itself out. It makes a perfect glass coating.
You need about 3 ounces of epoxy for every square foot of surface. This how to build an epoxy river table method is easier for beginners and the finish always comes out perfect, but it costs more and adds 2 to 3 days.
Step 12: Finish the Wood (Day 9)
The epoxy is done, but the wood still needs protection. Let’s pick your finish:
-
If the table will touch food: Use pure mineral oil or a beeswax and mineral oil blend. Both are food-safe. Mineral oil brings out the grain, but you have to reapply it sometimes. The beeswax blend is more water-resistant. Just make sure you use food-safe epoxy if the table is going to touch food directly.
-
If it's just furniture:
-
Rubio Monocoat Plus 2C: Really durable and lasts a long time. Easy to put on and maintain. Makes the wood grain look great. It will yellow light-colored wood over time, though, so it works better on walnut, cherry, or darker hardwoods.
-
Osmo PolyX Oil: Good water resistance and looks natural. Doesn't yellow light woods as much as Rubio.
-
Hard Wax Oil: Gives you a matte to satin finish. Holds up well and is easy to touch up later.
-
Gel Polyurethane: High gloss and very protective. Takes longer to cure.
Tips: Before you finish the wood, round over the sharp edges. Use a 1/4 inch round-over router bit on the top edges and a 1/8 inch bit on the bottom edges. Sand it smooth with 220 grit. This gets rid of sharp corners and makes it look more finished.
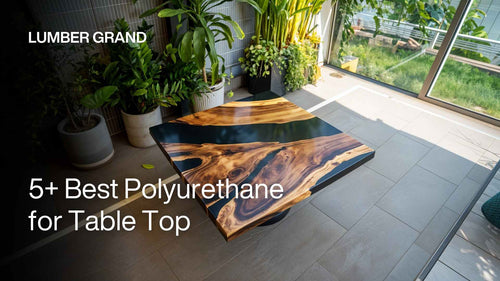
Read more: Best Polyurethane for Table Top
Step 13: Add Legs and Final Assembly (Day 10)
You're almost done with our how to make an epoxy river table process. Just need to add the leg to the tables.
-
Flip your table upside down. Use painter's tape and a measuring tape to mark where the legs go. Usually about 3 to 4 inches in from each corner.
-
Before you drill, check how thick your table top is. Measure your screw length and compare it to the table thickness.
-
Use a drill bit that's slightly smaller than your screws and drill pilot holes about 2/3 the length of the screw. Then screw the legs in tight. Make sure all the legs are secure.
-
Flip the table right side up and put a level on top. If it's not level, use felt pads or shims to adjust it.

How to Make a River Table with Epoxy — attach legs to epoxy river table top
Photo: Flowyline
Pro tips: With those bigger tables, like dining tables, you can add some stability. On the underside, rout out two channels running the length of the table, about 7/8 inch deep.
Then, you cut some 3/4 inch square steel tubing to fit in those channels (or you can buy C-channels for fastening), then screw it in place. This keeps the table from warping over time.
Congratulations! Your DIY epoxy river table is now complete!

How to make a river table — epoxy table for beginners
Credit: Lumber Grand
Shop now: Round Wooden Epoxy Coffee Table 29" Diameter
Latest this week: How to Remove Epoxy from Wood
FAQs
1. How Much Does It Cost to Make an Epoxy River Table?
You should expect about $700 — $1,200+ for a premium wood slab, like a big piece of walnut, which costs $400 to $700. High-end epoxy (4+ gallons) is $280 to $400. Multiple pigment colors are $50 to $80. Professional finishing supplies cost $60 to $80. A custom metal base runs $150 to $300.
Not to mention, if you don't have any tools. A minimal setup with a jigsaw, hand planer, drill, and sander costs $200 to $350. A standard power tool setup is $600 to $1,200. A professional setup with a planer and router runs $1,000 to $2,000 or more.
2. What Type of Epoxy is Used for River Tables?
Deep pour epoxy is what most people recommend for river tables. You can pour it 2 to 4 inches thick all at once. It takes 3 to 4 days to get hard. The formula runs cool, so it won't crack.
You can also use standard table top epoxy. It cures in 24 to 48 hours between layers. You have to wait 3 to 4 hours between each pour, and sometimes you can see lines where the layers meet.
3. What are Common Epoxy River Table Mistakes?
Here are the top 3 common mistakes when making an epoxy river table DIY:
-
A lot of people use the wrong epoxy. They go with standard table top epoxy instead of deep pour and end up having to do multiple layers.
-
Not mixing long enough is another big one. You need to mix for at least 3 to 5 minutes, but people stop after 1 or 2 minutes, and then the epoxy doesn't cure right.
-
Skipping the seal coat causes endless bubbles. The wood keeps releasing air into the epoxy, and you can't get rid of it all.
How to Make an Epoxy River Table: Conclusion
You've got everything you need to know about how to make a river table now. From picking out wood to screwing on the legs, you understand how the whole process works.
Here are things that we’ve gathered for you to remember:
-
Deep pour epoxy lets you do the river in one pour.
-
Seal coating stops bubbles and saves you money.
-
Keep the temperature between 70 and 77 degrees.
-
Don't rush the curing times.
-
Sand through every grit, or it won't look professional. You can make a great table with just four basic tools.
And here is the timeline:
-
Days 1 — 2: Get the wood ready and build the form
-
Day 3: Pour the epoxy
-
Days 4 — 7: Let it cure (mostly just waiting)
-
Days 8 — 9: Sand and polish
-
Day 10: Finish the wood and add legs
In general, you're looking at 20 to 30 hours of actual work spread out over 10 days. Besides, if you have questions about how to make an epoxy river table, reach out to us anytime at Lumber Grand. Thank you for reading!


